Category: Craft fun

Family Savings Jars – Dimes for Disney

Most of my crafty ideas start with me rummaging through the house to find whatever items I already have on hand.  I found these awesome mason jars (which held our store bought pasta sauce) and knew I needed to use them for something! Disney jars it is! I think my girls are still a little too young to appreciate the magic of Disney World. I really want them to experience it while they are young enough to believe in magic, but old enough to remember taking it all in. So the goal is to save up our dimes and celebrate their 5th birthday in Disney!

Here’s how I made the jars:

I chose glass jars so we can watch the money add up each week! They’re also small enough to carry to the bank when we are ready to deposit. (No thanks water cooler jug). Removing the labels is easy; just soak for 10 min. in hot soapy water.

Materials I found
Materials I rummaged

I found this great site that allows me to print Mickey ears with my kids’ initials in the Disney font. I cut and paste into a Word document and re-sized them to what I need.
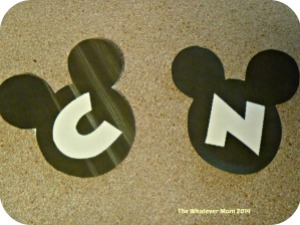
Print on card stock, cut and apply

It would have been awesome if I had thought to print on card stock (and checked my ink levels). Since I did not, I used them as templates to make these:
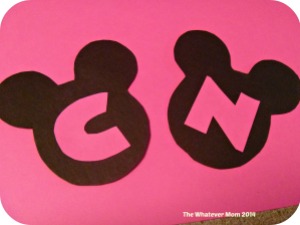
If you did not print on card stock use printed ears as template on actual card stock
If you did not print on card stock use printed ears as template for actual card stock

I found some pink polka dot ribbon to match the pink letters. I simply taped one edge to the glass and wrapped the ribbon tightly around the jar and used a glue gun to secure it. (Glue guns scare the heck out of me so I only use very sparingly).

Fold one end of ribbon over to create a clean fold before securing to other end of ribbon

I painted the lids to the jars last. I didn’t have any spray paint on hand, but I did have a pint of latex paint from a project I never completed. So, I just brushed some of that on. In hindsight spray paint might have been quicker, and I totally regret not using glitter.

Use spray paint for quicker application and clean up
Presto change-o!
Presto change-o!

Now how will we fill these wonderful Disney jars? With the blood, sweat and tears of toddlers of course! How else do toddlers earn a little extra pocket money? Yep! Chores! I am putting my 3 1/2 year-olds to work and using a Disney chore chart! I feel your concern regarding child labor laws, but let me assure you we keep the toddler chores pretty simple around here. The girls chore list includes picking up their own shoes, toys and dishes; which they do already. Only now we reward them with stickers and pennies. This is a great way to introduce the concept of rewards and consequences. Mwahahaha!
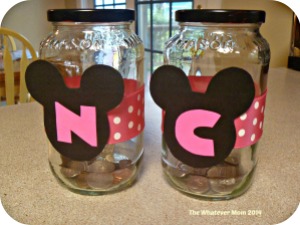
Finished jars
Finished jars

Maybe you’re not saving for Disney, but it might be fun to start a family fun jar to pay for a pizza night, movie tickets, or entrance to a water park. Whatever your goal is get the kids excited. Help them decorate a jar and decide on ways they can earn money to deposit. Drop in coins when you can, or let them deposit their allowance. It’s whatever you make of it!


Recipe Round Up!

Some of you have requested recipes for my sneaky sweet treats. You can Download your FREE copies using the links below.

All recipes have been toddler tested and hubby approved! Hope you enjoy!


avocado pudding Chocolate Avocado Pudding

My kids LOVE this recipe! I won’t name names, but one very picky eater won’t even touch an avocado. But, you mix it with dark chocolate cocoa powder and a some honey she’s all over it! We may have also enjoyed this as a lunch option once or twice.


Cookie snack Peanut Butter Chickpea Cookies

This twist on a traditional chocolate chip cookie goes completely undetected! The only difference is the texture. It doesn’t get crispy like a thin cookie, but remains doughy (will firm up once cool).


Banana ice cream Banana Ice Cream Sandwiches

This is a great dairy alternative for those with sensitivities! It takes a little longer with freeze time. My kids thought it was a fun “experiment.” Hey, whatever gets them to eat it! You can skip the crackers and eat the banana ice cream straight from the bowl! The flavor combinations are endless. Add in peanut butter, frozen berries, chocolate. Get creative!


Hummus Sweet potato hummus

Picky eater says what? This homemade hummus made with chickpeas and sweet potatoes has a slight sweetness. It pairs well with apples, carrots, purple grapes and the toddler staple: Goldfish crackers. As a bonus, I used this hummus in place of oil in a boxed brownie mix. It made cake like, dense brownies. I am pretending the extra protein balanced out all the sugar in the mix.


2014 5 23 038


Please share any favorite ‘hidden’ recipes!

Backyard Pirate Adventure

I had been trapped for hours in the back yard. Forced to swashbuckle against my will. Someone put a twig in my hand and made me sword fight before I was told to walk the plank. This is not a bad dream. This is my children’s obsession with all things Pirate. Yes, friends my girls love pirates. The bad boys of the high seas. So, when a friend of mine hand delivered an invitation to her son’s pirate themed birthday party, I had no choice. I had to make them their own treasure maps. Mostly because I had two kids fighting over one treasure map. (Thanks G!)

Start by brewing some tea. Not to relax with, but to paint with! Be sure to allow the tea to steep long enough to make a dark brown color. The tea stains make the paper look like aged parchment paper.

Brew regular or decaf tea

Pour a small amount into a bowl, or cup.

Pour small amount into bowl. Small amount = smaller spill.
Small amount = smaller spill.

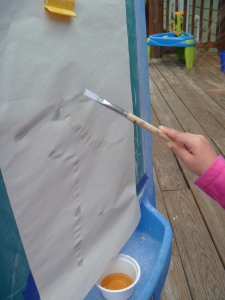
Use whatever paper you have on hand. (We used regular drawing paper pulled from the tablet). Next, give your kid their favorite paint brush and let the painting begin. Or, you can place smaller pieces of paper on a tray with edges (baking sheet works too) and let them pour the tea over them. Hang it up to dry.

The color on our paper came out lighter than I wanted. After it dried I poured more tea over it and allowed to dry. This made a wonderful layered color effect.

Use paint brush to apply tea to paper

Use paint brush to apply tea to paper

Since the pages were too wet to draw our maps on we left them in the sun to dry while we searched for treasure. The girls sorted their glass gems and gathered their “booty” from their dress up jewelry collection.

Panning for golden treasure

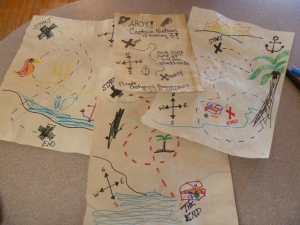
Once the pages were dry I tore them in half to give the edges a more weathered look. This also gave each kid two maps of their very own.  I used our markers to add colorful nautical art to each map. In true pirate fashion, the girls dictated what they wanted me to draw on their maps.

Final maps
Our maps next to the inspiration map

After everything had completely dried we took the maps outside to walk a treasure trail in our yard.We took turns hiding and finding our treasures. Of course I had to walk the plank AGAIN. It’s not my fault I’m an awesome treasure hunter! Best part of the project is it didn’t cost me a single doubloon.


What ‘argh’ ya planning for your back yard adventures? ‘Shiver me timbers’ I need to get out more!


Kid’s Art Storage

During my last visit home my mother handed me this haphazardly filled box of some of my old artwork and collectibles. Not everything fit and it was spilling over the sides of the box. I dropped most of its contents on the way to the car. I was excited to see mementos of my childhood but overwhelmed by sorting through it.

My sad little box.
My sad little box.

This made me think about how to store my kid’s little creations. Now that they are in pre-school they bring home new art projects each week (times 2). I went in search of ways to organize and store their creations. I wanted something to last through their school years.

Some time ago I found a nifty and thrifty way to display our weekly creations. I fashioned a very simple and inexpensive hanging gallery using twine, 3M Command hooks and clothes pins. All stuff I already had on hand. This hangs close to our entry way so the girls can clip their art as soon as they walk in the door.

Our gallery line
Our gallery line

Simply apply the Command hooks according to directions and tie the ends of a piece of twine to each. Clip artwork to the line with a clothes pin. You can get as fancy as you’d like by using colored ribbon and colored clothes pins, or just keep it simple and use what you already have.

3M Command Hook

3M CommandHook

Artwork stays in the gallery for about a week (when the next round of art work starts coming in) before I sort through which pieces to keep and which pieces to toss. I am a ruthless chucker. I only keep the pieces that are really special. I’m a sucker for hand prints, projects made for mom and dad and anything that looks like more than practice scribbles. We haven’t had any over sized pieces yet, but I am already planning to toss those (unless my children are prodigies in that case I’ll keep them).

For storage, I purchased two plastic file bins at Walmart for less than $20.00. I re-purposed some file folders I already have and downloaded some free printables I found online. I like the simplicity of someone else doing the work and then downloading to print.

File storage bins
File storage bins

I don’t have enough storage for each child to have their own file bin, so I am doubling up. One bin is marked for preschool through sixth grade. The second bin is marked for seventh grade to twelfth grade. I will drop keepsakes for each child into one file folder and let them sort it out (10-20 years) later. Each folder is pre-labeled with the school year and inside each folder is a cover sheet to include school picture and school info. Since everything is labeled I can just drop kids’ keepsakes into appropriate school year and be done.

Pretty little tabs all in a row

I save myself years of organizing time, and I save my kids the hassle of dragging toppling boxes to the car one day. The whole project took me less than 30 minutes. The most time consuming part is cutting out the labels and putting in the tabs. A project you can do easily in front of the TV.

How do you save your kids artwork? Are you a ruthless purger, or a keepsake queen?

A Funny Bunny Photo Booth

Our sunny funny photo booth

I wanted to do something really fun for the girls Easter pics this year. Short on time and money for a professional photographer, I decided to create my own funny bunny photo booth. But once I made the booth it was too cute to keep to ourselves. So, we invited a few friends for an impromptu bunny bash. Luckily, my very awesome (and talented) friend Danielle brought her fancy camera along to get some great pics of our little party goers.  A total bonus!

Our photographer Danielle and her daughter Sydney

I selected a fun background to give our photo booth a casual feel. I used a chevron designed wrapping paper taped to an extra piece of paneling we had lying around. You could tape it to your wall, but hanging the paper on the wall is a two person job and I am a one mom operation. Using the panel was easier and allowed me to hide the back drop so I could surprise the girls in the a.m.

Use painters tape to keep wrapping paper in place

I strung a line of foam shaped chicks across the patterned paper. I simply taped some twine to the back of each chick. You could easily skip the paper and just hang a string of fun themed shapes to a clean colorful wall inside your home. Or, move outside and hang the shapes along a fence, around a tree, or on the side of your house.

Tape foam shapes to a piece of twine for an easy garland

This time of year you can find bunny ears at every dollar store- a must have for a funny bunny photo booth!

Bunny ears from Target

To make a bunny face I used a wooden mustache prop I found at Michael’s.  I added a fuzzy pom-pom nose and some colorful pipe cleaner whiskers for a touch of whimsy. I tried to use Elmer’s glue, but the hot glue gun worked the best.  Of course I had to add in some recognizable bunny teeth. I used white craft foam with adhesive backing and attached directly to the mustache.

Easy to make props
Easy to make props

I situated our photo booth in the sunniest spot of our house. Natural lighting makes for the best photos! Then, we handed the kids the props and let them have fun! I wasn’t worried about them posing angelically; I was just shooting for nobody crying. My goal was to make some fun memories with our friends. Mission accomplished! How cute are these kids?

Friends posing as bunnies
Bunny buddy
Bunny buddy
Little bunny
Little bunny

For less than $10 I now have some fun pics to commemorate our Easter holiday. I can print as many photos as I’d like and email copies to distant relatives (thank you Danielle!).

A themed photo booth is a great alternative for kids who are afraid of the Easter bunny, or maybe too little to meet the EB yet. It’s also an easy, affordable, fun activity to do for birthday parties, play dates, or holidays. Just change up your props!


Have you taken your own kid pics at home? What do you do to make it fun?

Gratitude

Cheers to my readers!

Just a quick post to say thank you to everyone for supporting my blogging efforts! I truly appreciate that you take the time to comment, like and share my posts. It was your support that gave me the courage to start this blog in the first place. THANK YOU!

I am also very thankful my blog was picked up early by a local magazine, Hudson Valley Parent. If you are already following The Whatever Mom blog  you should receive an email every time I post a new entry. If you are not already following me here, please do!!

Get additional pics and updates on The Whatever Mom Facebook page! I will share my Hudson Valley Parent posts on all my Facebook pages!

If this is your first visit to my page- thank you for stopping by! You are welcome to join the party and get weekly updates. Simply click the small gray follow button in the low right hand corner and follow the instructions. To find out more about The Whatever Mom check the about me section.

Please feel free to comment below, or contact me via Facebook with craft ideas and questions!

Thank you all again from the bottom of my heart! Cheers!

Eggless Easter Fun!

2014 Easter Blog 002

Last year I discovered the simple beauty of plastic Easter eggs and fuzzy pom-poms. With Easter right around the corner I’m bringing these back! It usually buys me at least 30 uninterrupted minutes. I can almost hear my own thoughts while finishing the dishes!

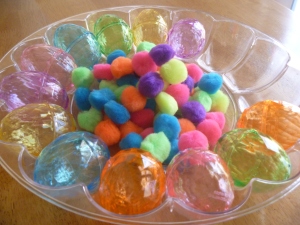
First, I picked up some plastic eggs and pom-poms at the dollar store.

Pick up items at any dollar store.

Next, I dumped them into a deviled egg tray for easy access and storage. That’s it! Done! The kids will take care of the rest! (If you don’t have pom-poms you can use cotton balls).

Eggs and pom-poms
Eggs and pom-poms

You can find an egg tray similar to this one at the dollar store. I just happened to have one on hand.  You can also recycle an egg carton to store the eggs in. Use whatever works for you.

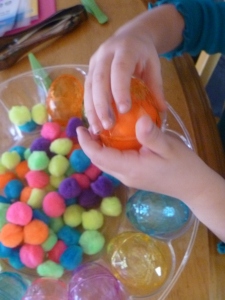
The first things my girls do is sort and match the colors by placing the pom-poms into the matching colored egg.

Color sorting/matching

Next they enjoy using kid sized plastic tweezers to count out the pom-poms and fill the eggs. (This is a great activity for developing fine motor skills).

2014 Easter Blog 003

Then they just like to make up their own games through pretend play. They grab handfuls of pom-poms and pile them up and mix them up. Sometimes they pretend to go shopping for eggs and fill up an empty shopping bag.

2014 Easter Blog 011

No matter which scenario they choose, we almost always end with – you guessed it- an Easter egg hunt. They like to take turns hiding the eggs and finding them.  Of course I have to help look for the eggs too.

Last year when I first introduced this to my girls they were 28 months old. I was worried they’d eat the pom-poms, so I sat nearby while they played with them. They also enjoyed taking them into the bath tub, dumping the pom-poms into a bowl to mix with a spoon, and just comparing the fuzzy feeling of the pom-poms with the smooth feeling of the eggs.

This year they found a new way to play- Pom-pom soccer!

Use a straw to blow pom-poms across the finish line.

The first one to blow a pom-pom into an egg using a straw wins. I love that there are so many different ways to play with these simple things many of us already have around the house.

Got a favorite simple (mess free) activity you’d like to share?


Thank you to everyone for following my blog! You can also find me at at http://hudsonvalleyparentblog.wordpress.com/


error

Building a community one click at a time.