Greetings on this rainy 4th of July! If your day is starting out like ours, you may need some ideas on how to spend this rainy day inside with your little ones. Below is a recap of some fun things to do while stuck inside.
Today is the perfect opportunity to check off some of those summer bucket list items! If you haven’t made your summer bucket list yet there’s still plenty of time! Or you can just use this 2014 Summer Bucket List printable.
Arrrr ya ready for an indoor Pirate adventure? Take some time to make a map then hide treasures around the house and find them using your map.
Final maps
Did you miss my post on making pinwheels? This is a quick, fun activity to do with the kids. Use whatever paper you have on hand!
Final product
How about simply bringing out the paints and paper and let the kids run wild? Here are some easy, fun July 4th craft ideas.
So you just blew through all the crafts in less than an hour, now what? Who says you have to stay inside ALL day? Why not let your kids run outside to play in the rain? Every kid loves dancing n the rain! They are only little once! Maybe it will inspire you to host your own Mess Fest later this summer?
The perfect day for puddle jumping!
However you choose to spend your day I hope it is relaxing, safe and enjoyable. Happy July 4th everyone!
Last year I discovered the simple beauty of plastic Easter eggs and fuzzy pom-poms. With Easter right around the corner I’m bringing these back! It usually buys me at least 30 uninterrupted minutes. I can almost hear my own thoughts while finishing the dishes!
First, I picked up some plastic eggs and pom-poms at the dollar store.
Pick up items at any dollar store.
Next, I dumped them into a deviled egg tray for easy access and storage. That’s it! Done! The kids will take care of the rest! (If you don’t have pom-poms you can use cotton balls).
Eggs and pom-poms
You can find an egg tray similar to this one at the dollar store. I just happened to have one on hand. You can also recycle an egg carton to store the eggs in. Use whatever works for you.
The first things my girls do is sort and match the colors by placing the pom-poms into the matching colored egg.
Color sorting/matching
Next they enjoy using kid sized plastic tweezers to count out the pom-poms and fill the eggs. (This is a great activity for developing fine motor skills).
Then they just like to make up their own games through pretend play. They grab handfuls of pom-poms and pile them up and mix them up. Sometimes they pretend to go shopping for eggs and fill up an empty shopping bag.
No matter which scenario they choose, we almost always end with – you guessed it- an Easter egg hunt. They like to take turns hiding the eggs and finding them. Of course I have to help look for the eggs too.
Last year when I first introduced this to my girls they were 28 months old. I was worried they’d eat the pom-poms, so I sat nearby while they played with them. They also enjoyed taking them into the bath tub, dumping the pom-poms into a bowl to mix with a spoon, and just comparing the fuzzy feeling of the pom-poms with the smooth feeling of the eggs.
This year they found a new way to play- Pom-pom soccer!
Use a straw to blow pom-poms across the finish line.
The first one to blow a pom-pom into an egg using a straw wins. I love that there are so many different ways to play with these simple things many of us already have around the house.
Got a favorite simple (mess free) activity you’d like to share?
Thank you to everyone for following my blog! You can also find me at at http://hudsonvalleyparentblog.wordpress.com/
How often do you find awesome projects on Pinterest and think, “who has time for that?” Or, “I would never think of that!” That’s what inspired me to create these super simple busy binders! I used items I found at dollar stores. No need to use up my ink to print off a ton of pages. No need to laminate. These are re-usable, inexpensive and require very little time to make.
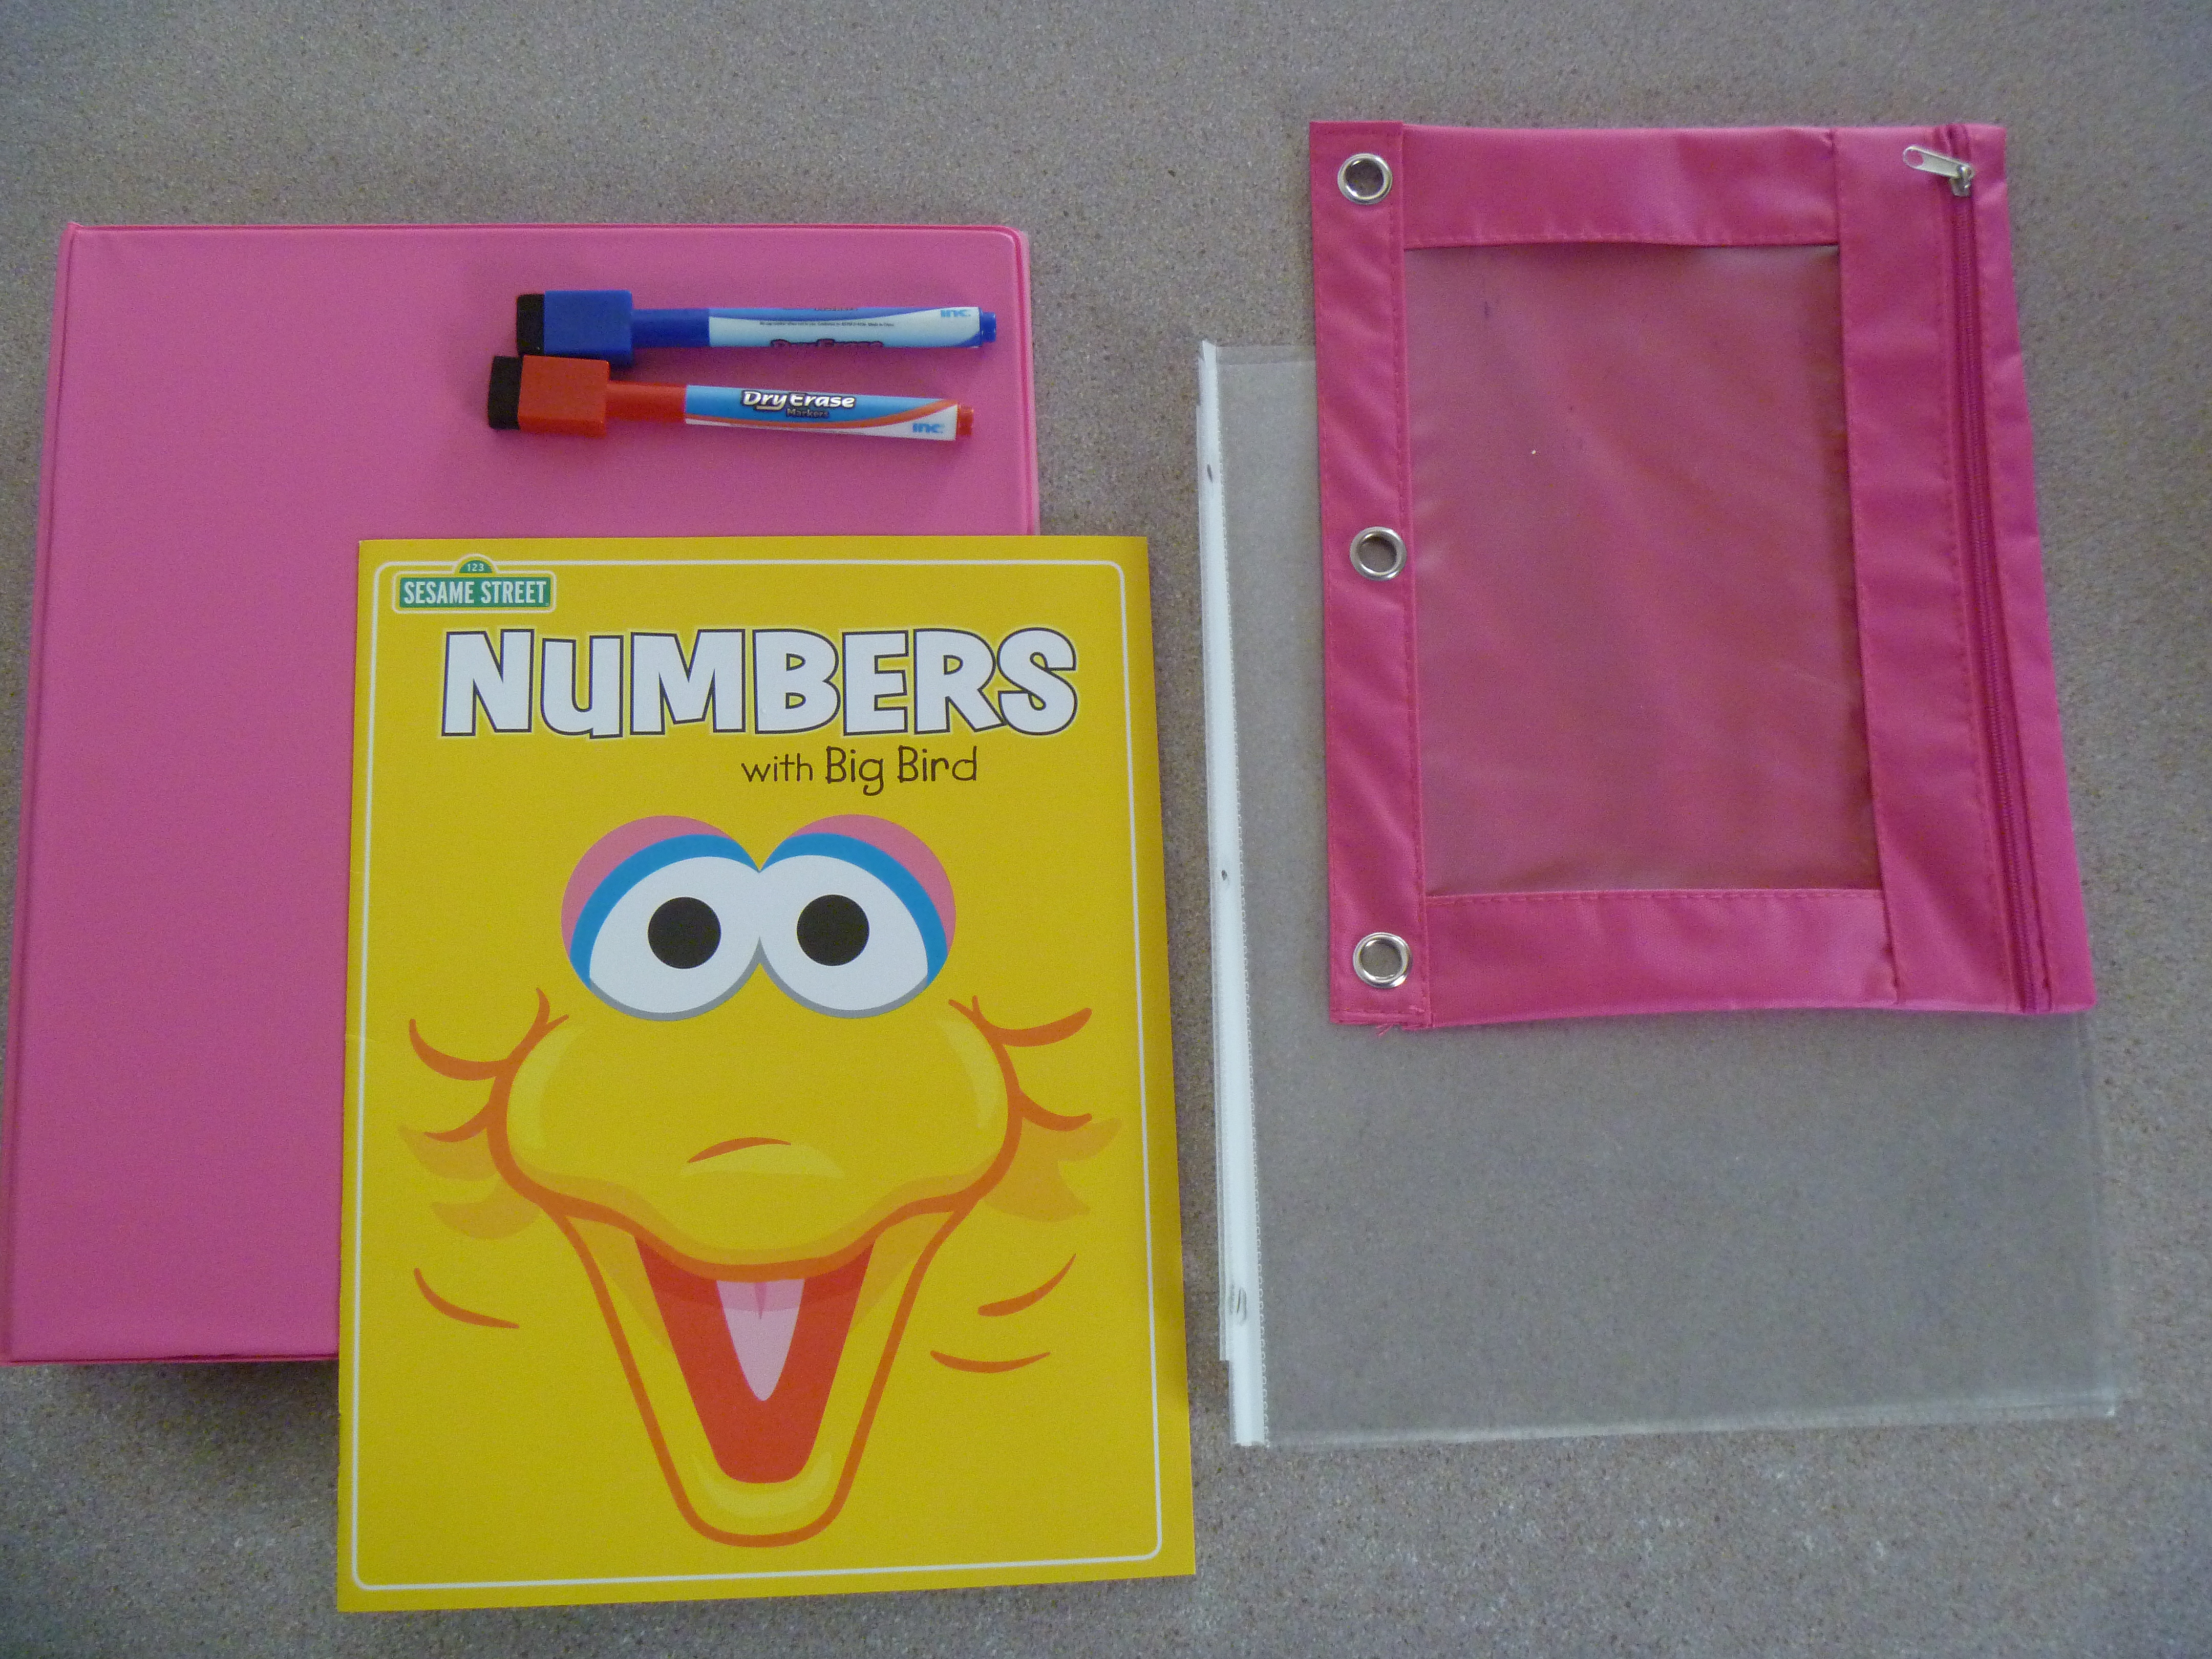
Materials for busy binder
I found activity books at the Dollar Tree. (Target has similar books in their dollar section). I picked up some colorful 3 ring binders at Big Lots for .90 cents each along with matching zipper pouches for $1.00 each. I reused some plastic page protectors and dry erase markers I found at home. So, each binder cost around $2.90. (I made 4).
Zipper pouch to always have pens on hand.
The zipper pouch in the front of each binder holds dry erase markers for easy storage. I especially like the dry erase markers with the felt tipped eraser caps. This way the girls can erase their marks on their own if necessary.
Be sure to use dry erase markers.Use book cover as first page in binder.
The first page of the binder holds the cover of the activity book. If you want to get fancy, buy a binder that includes a front and back clear view pocket. Place the front cover of the activity book in the front clear view pocket and the back cover of the activity book in the back clear view pocket. The clear view binders run about $3-$4 each. The plastic page protector is my cheater version.
Insert individual pages in pockets.
The following pages include activity sheets I detached from the book. I inserted one page per plastic sleeve.
Pocket protectors make it easy to erase and use again.
Now the girls can re-use the pages as many times as they’d like. I simply erase when they are finished, or encourage them to clean with a paper towel before putting the binder away.
Inside binder
I keep the binders on a shelf for easy toddler access.
Binders on shelf.
I have an open shelf area at the end of our counter that I keep busy activities for the girls to grab and play with any time they like. This has saved me during phone calls, while chatting with other adults and that rat race called dinner hour.
Open access to activity shelf.
I assembled all 4 binders in less than 20 minutes! The materials are easy to find, inexpensive and assemble quickly. No printing! No coloring! No laminating!
What are some busy projects you have to occupy little ones?
The Whatever Mom is a twin mom learning to let go of perfection. She shares her real life struggles with parenting through her blog and contributes her time and talents as a writer to Hudson Valley Parent and Masshole Mommy. When she isn’t writing you can find her chugging coffee, folding laundry and not judging other parents. Don’t forget to subscribe via email so you never miss a blog post again! You can also find her work featured on Mamapedia and The Novice Mommy.